Recording your Ubuntu desktop can be incredibly useful, whether you’re creating video tutorials, recording presentations, gaming sessions, or troubleshooting issues. Ubuntu offers multiple tools, both built-in and third-party, to record the screen and save it as a video. This guide covers everything you need to know, from built-in options to advanced screen recorders.
Why Record Ubuntu Desktop?
🔹 Capture tutorials and share knowledge easily
🔹 Record meetings, presentations, or online lectures
🔹 Save gameplay videos for streaming or personal use
🔹 Debug software issues by recording error occurrences
🔹 Create professional content for YouTube or documentation
Now, let’s explore how you can record Ubuntu desktop seamlessly.
How to Record Ubuntu Desktop Using Built-in Screen Recorder?
Ubuntu comes with a simple built-in screen recorder, requiring no additional software. Here’s how it works:
- Press
Ctrl + Alt + Shift + Rto start recording. - A red dot appears in the system tray, indicating the recording is active.
- Press the same key combination (
Ctrl + Alt + Shift + R) to stop recording. - The recorded video is automatically saved in the
Videosdirectory in.webmformat.
Limitations of Ubuntu’s Built-in Recorder
❌ No audio recording support
❌ Limited to 30 seconds (unless changed via settings)
❌ No configuration options (frame rate, format, or quality)
Once you start the recording, on top right corner you will see the recording icon as shown in below image for 30 sec and will stop automatically after 30 sec. After this go to “/home/your_user/Videos” and you can find a file as “Screencast from Tuesday DD Month YYYY HH:MM:SS IST.webm
How to Record Ubuntu Desktop with Audio Using SimpleScreenRecorder?
🔧 SimpleScreenRecorder is a powerful tool with audio recording, customizable frame rates, and different formats.
Installation
Open a terminal and run:
sudo apt update && sudo apt install simplescreenrecorder -yNow, when you want to record the screen, start this simplescreenrecorder application from activities or from command line and just follow below images..
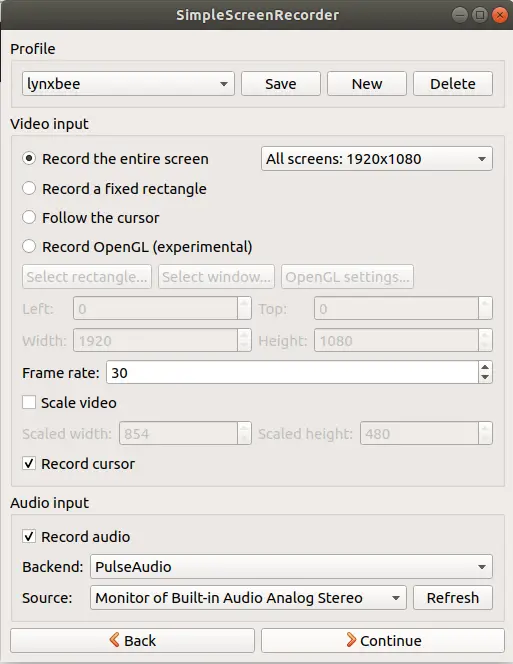
Once you start simplescreenrecorder application, you will see similar window as below, on this you can create a new profile which would then save as default settings, decides how your screen needs to be captured, default auto input and click on Continue.
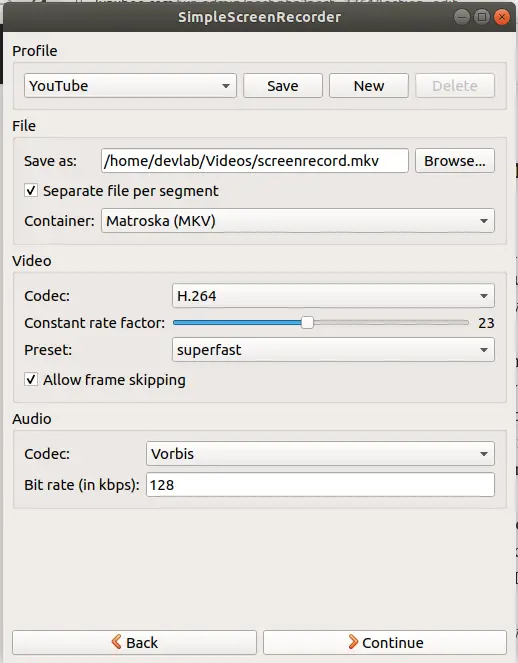
On the next screen, you can decide the codec’s for your audio and video or can select the predefined “YouTube” profile to record.. , select where your file needs to be saved and click on “Continue”
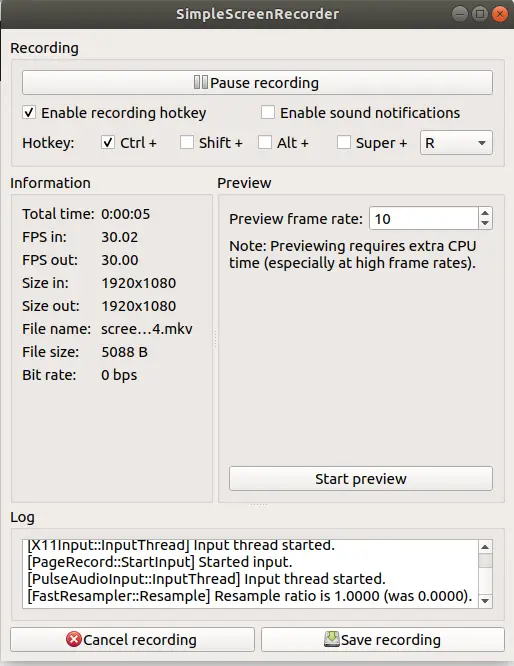
On the next screen, when you are ready to start recording click “Start Recording”
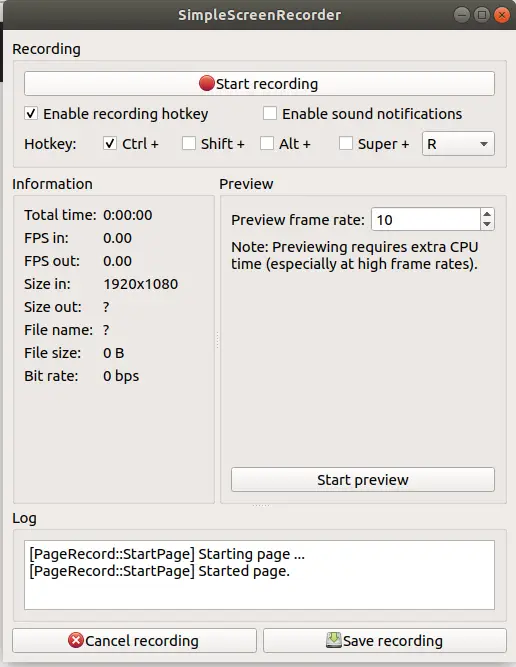
On the next screen, when you are actively recording you will get an option to “Save Recording” when your recording is done..
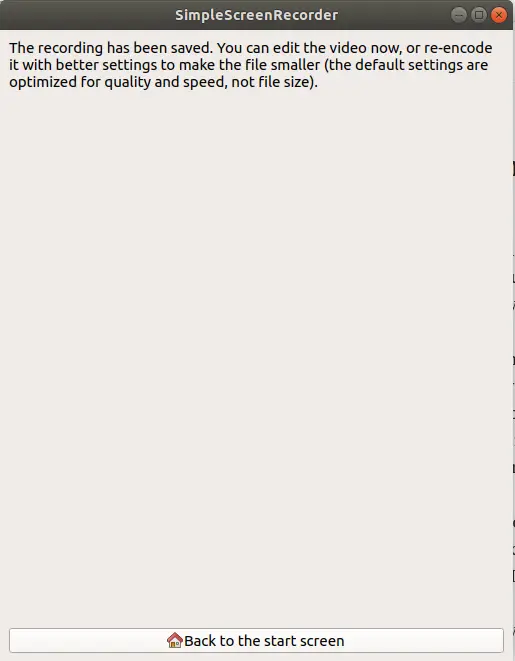
Below is the last option, which navigates to main screen..
Possible Issues and Fixes While Recording Ubuntu Screen
1. Screen Recording Not Working?
✔ Restart your system and try launching the screen recorder again.
✔ Ensure your system is updated using:
sudo apt update && sudo apt upgrade -y2. No Audio in Recorded Video?
✔ Check if the correct audio input is selected in SimpleScreenRecorder.
✔ Verify audio permissions using:
pactl list sources | grep NameBest Video Formats for Saving Ubuntu Recordings
| Format | Best For | Pros |
|---|---|---|
| MP4 | General use, YouTube | High quality, widely supported |
| MKV | Streaming | Supports multiple audio tracks |
| WebM | Web compatibility | Open-source, lightweight |
| GIF | Short Clips | Easy to share, looped videos |
Recording your Ubuntu desktop is now easier than ever with tools like SimpleScreenRecorder and OBS Studio. Whether you want a quick capture with Ubuntu’s built-in tool or an advanced setup for professional video recording, these options cover all your needs. By choosing the right format and configuration, you can create high-quality videos for tutorials, presentations, or gaming sessions effortlessly.
Start recording your Ubuntu screen today and enhance your workflow with professional-grade video content!