Sometimes when you are accessing one machine remotely or from same LAN but from another machine and if your machine which you are trying to access has DHCP enabled, it may get assigned different IP address everyday and you will always need to check IP address of that machine before you try to access it. The best solution for this problem is you set the static IP address to this machine so you just remember it once and access that machine using same IP address always.
Following steps describes how you can set the Static IP address to any Linux machine and Ubuntu as well.
Using command line
type below commands on Linux shell / terminal, Check the active network interface of your machine to which you want to set Static IP,
$ ifconfig -a For our machine, wlp3s0 is the WiFi interface and enp2s0 is the Ethernet interface. Alternatively if you are trying to set this on Embedded Linux, you may see those as, wlan0 for wifi and eth0 for Ethernet.
Now, update static IP address to this interface by modifying cat /etc/network/interfaces file, but before that you need to know which is free IP address currently in your network which is not used by any other machine. You can do that by trying to ping to some IP address’s in your network and check which IP address doesn’t reply means its free and can be used to assign to this machine.
Check, current contents of /etc/network/interfaces
$ cat /etc/network/interfaces
# interfaces(5) file used by ifup(8) and ifdown(8)
auto lo
iface lo inet loopback
Now modify this file as,
$ vim cat /etc/network/interfacesauto lo wlp3s0
iface lo inet loopback
iface wlp3s0 inet static
address 192.168.0.104
netmask 255.255.255.0
gateway 192.168.0.1in above, you may need to replace “wlp3s0” with your machine’s network interface and address “192.168.0.104” as you want and gateway “192.168.0.1” as per your network.
Now, reboot once and you will see your machine IP address is set to predefined static IP as set above.
Using User Interface for Ubuntu
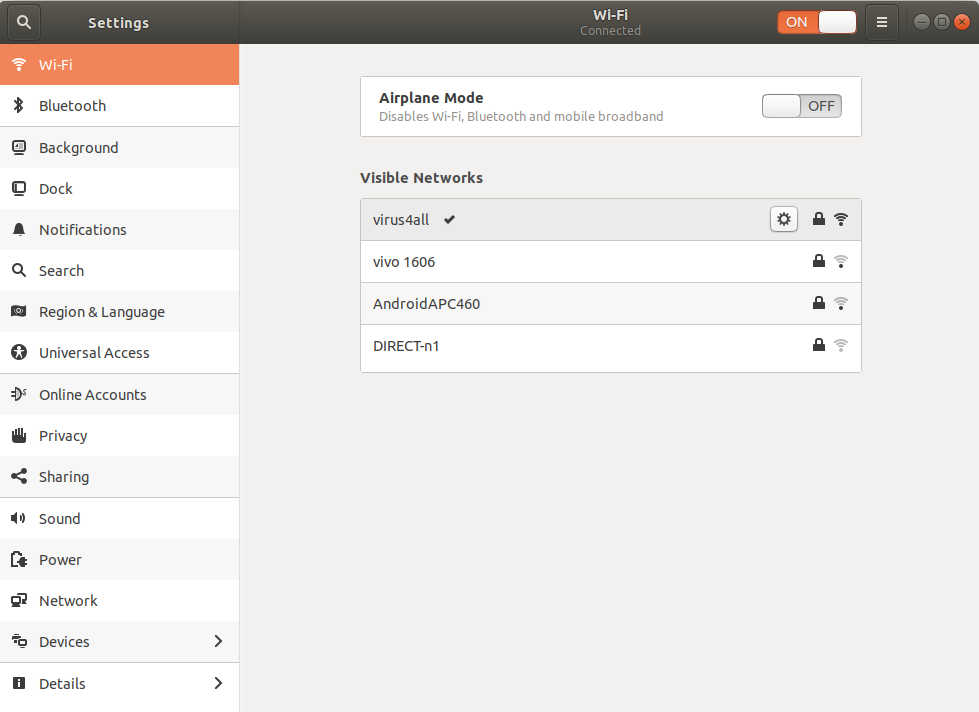
Open network settings by searching into “Settings” into Activities search.
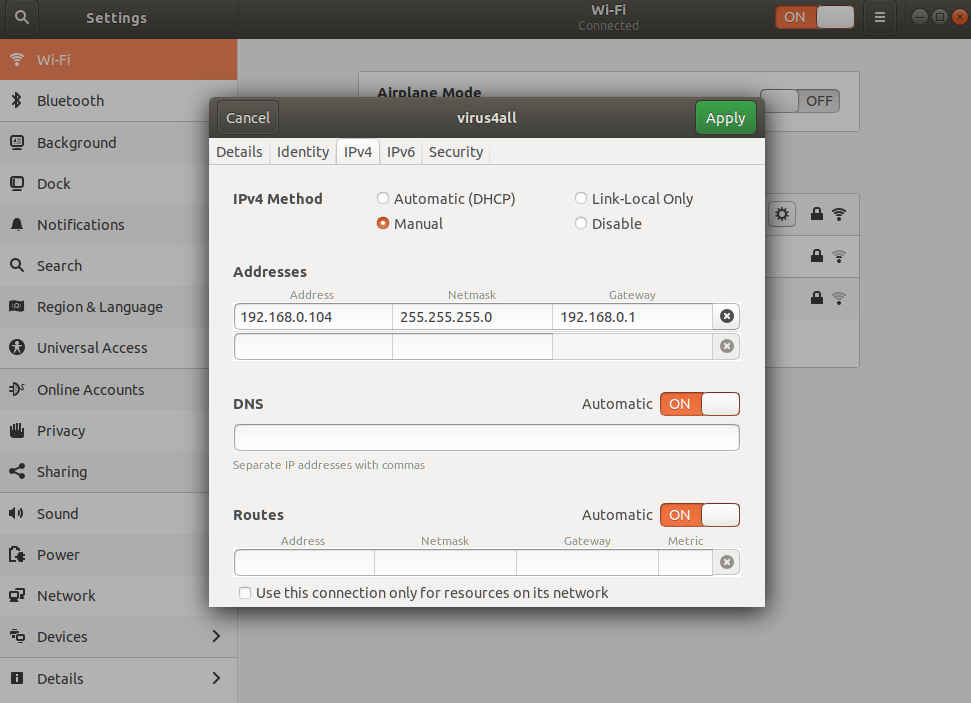
Select your network interface, in our case we had connected over WiFi, hence selected wifi, , then select your SSID and click on settings wheel as seen in-front of our ssid “virus4all” 🙂
Now, from IPV4 tab, select IPv4 method to “Manual” and update IP address’s as shown below and click Apply. ( Note: change as per your IP address )
Reboot and done .. you should always see the static IP address assigned. 🙂