
OpenGrok is a fast and usable source code search and cross reference engine. It helps you search, cross-reference and navigate your source tree. It understands various program file formats and history from many Source Code Management systems. In other words it lets you grok (profoundly understand) source code and is developed in the open, hence the name OpenGrok. It is written in Java.
Following steps helps you to setup opengrok on ubuntu machines.
Dependancies – Opengrok is dependent on JDK and universal ctags which can be installed as,
$ sudo apt-get install openjdk-8-jdk$ sudo apt-get remove exuberant-ctags$ sudo snap install universal-ctagsYou can refer to “How to install universal-ctags on Ubuntu” to understand more about universal ctags.
You will also needs to install Tomcat as mentioned below,
$ mkdir devlab$ cd devlab$ wget -c https://mirrors.estointernet.in/apache/tomcat/tomcat-8/v8.5.53/bin/apache-tomcat-8.5.53.tar.gz$ tar xvf apache-tomcat-8.5.53.tar.gz$ mv apache-tomcat-8.5.53 tomcatYou can also directly download tomcat 8 from https://tomcat.apache.org/download-80.cgi and extract as you want.
Next, we need to create some dependent directories and copy source.war from opengrok to tomcat as,
$ mkdir -p $PWD/opengrok/{src,data,dist,etc,log}$ tar -C $PWD/opengrok/dist --strip-components=1 -xzf opengrok-1.3.11.tar.gz$ cp $PWD/opengrok/dist/doc/logging.properties $PWD/opengrok/etc$ cp $PWD/opengrok/dist/lib/source.war tomcat/webapps/Now, we will write simple script to source the environment variables as required to setup tomcat and opengrok as,
$ vim setenv.sh#!/bin/bash
TOMCAT_DIR=$PWD/tomcat
export CATALINA_BASE=$TOMCAT_DIR
export CATALINA_HOME=$TOMCAT_DIR
export CATALINA_TMPDIR=$TOMCAT_DIR/temp/
# OpenGrok exports
export OPENGROK_TOMCAT_BASE=$CATALINA_HOME
export OPENGROK_WAR_TARGET_TOMCAT=$TOMCAT_DIR/webapps/
export OPENGROK_INSTANCE_BASE=$PWD/opengrok/src/Now, we can start the tomcat server as,
$ bash $PWD/tomcat/bin/startup.shThe server will be started at http://localhost:8080/
as we can see in setenv.sh script, we have set OPENGROK_INSTANCE_BASE as $PWD/opengrok/src/ i.e. opengrok/src directory from current “devlab” directory. This opengrok/src/ direvtory is where we have to download the source for which we want to build the cross reference / search database.
For example, we used following two git sources, you can use any git from your source code,
$ cd $PWD/opengrok/src$ git clone https://github.com/githubtraining/hellogitworld.git$ git clone https://github.com/OpenGrok/OpenGrokNow, the last step to get everything working is to run the indexer which will create the indexing of the source which can be used for searching using browser..
$ cd devlab$ vim run_indexer.sh#check where ctags is using "which ctags" command...
java \
-Djava.util.logging.config.file=$PWD/opengrok/etc/logging.properties \
-jar $PWD/opengrok/dist/lib/opengrok.jar \
-c /snap/bin/ctags \
-s $PWD/opengrok/src -d $PWD/opengrok/data -H -P -S -G \
-W $PWD/opengrok/etc/configuration.xml -U http://localhost:8080/sourceTime required for indexing will be depending on size of your source code from $PWD/opengrok/src , once indexing is complete you will see the opengrok up and running at http://localhost:8080/source/ as shown below,
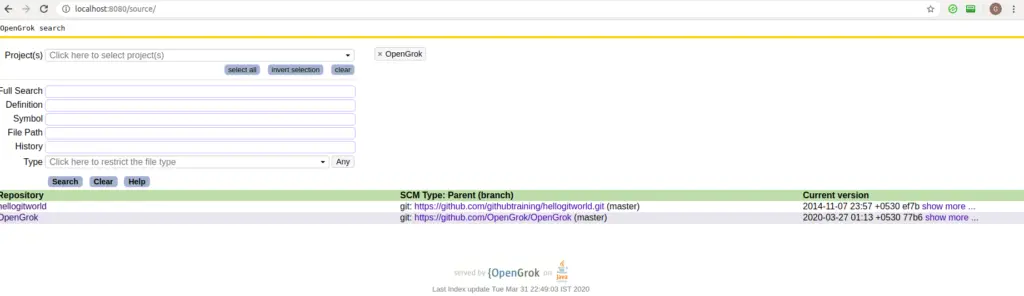
You can download the entire source code from https://github.com/lynxbee/opengrok