In the world of website management, optimizing images is crucial for maintaining fast loading times and improving user experience. Large, unoptimized images can slow down your website, affecting both performance and SEO rankings. The EWWW Image Optimizer plugin for WordPress is a powerful tool designed to tackle this issue by automatically compressing and optimizing images. This post will explore the features, benefits, and usage of the EWWW Image Optimizer plugin to help you get the most out of your image optimization efforts.
Table of Contents
- What is EWWW Image Optimizer?
- Key Features of EWWW Image Optimizer
- How to Install EWWW Image Optimizer
- Configuring EWWW Image Optimizer
- Using EWWW Image Optimizer for Bulk Optimization
- Advanced Features and Settings
- Troubleshooting Common Issues
What is EWWW Image Optimizer?
EWWW Image Optimizer is a WordPress plugin designed to optimize and compress images on your website. It helps reduce file sizes without compromising quality, leading to faster page load times and improved overall site performance. The plugin supports various image formats, including JPEG, PNG, and GIF.
Key Features of EWWW Image Optimizer
- Automatic Compression: Automatically optimizes images upon upload, saving you time and effort.
- Lossless Compression: Reduces image size without affecting quality, ensuring images remain sharp and clear.
- Bulk Optimization: Allows you to optimize all existing images on your site in one go.
- WebP Conversion: Supports conversion of images to WebP format, which offers superior compression.
- Cloud Optimization: Integrates with cloud services for additional compression capabilities.
- Compatibility: Works with various WordPress themes and plugins.
How to Install EWWW Image Optimizer
- Login to WordPress Dashboard: Access your WordPress admin panel.
- Navigate to Plugins: Go to the “Plugins” menu and click on “Add New.”
- Search for EWWW Image Optimizer: Enter “EWWW Image Optimizer” in the search bar.
- Install the Plugin: Click “Install Now” next to the EWWW Image Optimizer plugin.
- Activate the Plugin: After installation, click “Activate” to enable the plugin on your site.
Configuring EWWW Image Optimizer
- Access Settings: Go to “Settings” > “EWWW Image Optimizer” in the WordPress dashboard.
- General Settings: Configure basic settings such as compression level and image formats.
- Optimization Settings: Choose between lossless and lossy compression options.
- WebP Conversion: Enable WebP conversion if desired, and configure related settings.
Using EWWW Image Optimizer for Bulk Optimization
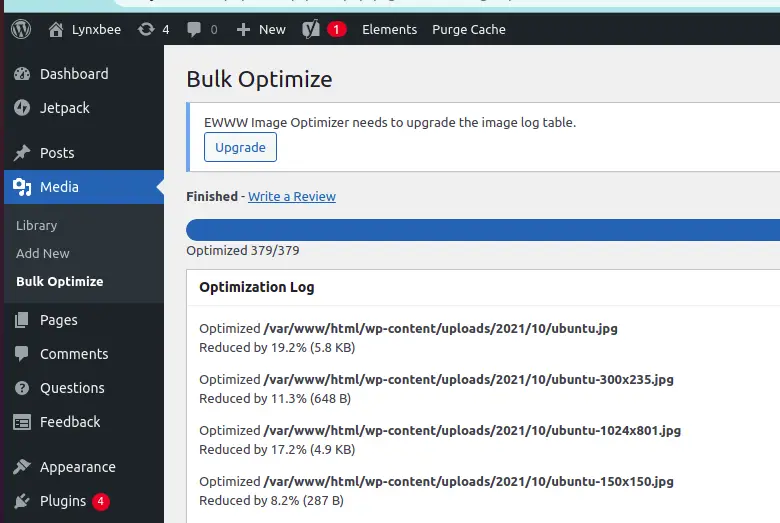
- Go to Bulk Optimizer: Navigate to “Media” > “Bulk Optimize” in the WordPress dashboard.
- Select Images: Choose the images you want to optimize or select all.
- Start Optimization: Click the “Start Optimizing” button to begin the process.


The plugin will process and optimize the selected images, reducing their file sizes and improving page load times.
Advanced Features and Settings
- Image Resizing: Configure automatic resizing of images to specified dimensions.
- Backup Images: Enable backup options to restore original images if needed.
- Scheduled Optimization: Set up scheduled tasks for regular image optimization.
Troubleshooting Common Issues
- Images Not Optimizing: Ensure the plugin is correctly configured and that file permissions are set properly.
- Quality Issues: Adjust compression settings to balance between file size and image quality.
- Compatibility Problems: Check for conflicts with other plugins or themes.
Conclusion
The EWWW Image Optimizer plugin is an essential tool for WordPress users looking to improve website performance through effective image optimization. By automating the compression process and offering a range of features, it helps ensure your images are as efficient as possible without sacrificing quality. Install and configure the EWWW Image Optimizer today to start enjoying faster page load times and a better user experience.