When hosting a website or web application on an Amazon Linux EC2 instance, using the default public IP address or public DNS can be inconvenient. Every time the instance is stopped and restarted, the public IP changes, requiring manual updates. The best solution is to map a custom domain name to the EC2 instance, allowing access via a user-friendly URL instead of an IP address. In this guide, you will learn how to use a domain name instead of public DNS or IP in Amazon Linux EC2, ensuring a professional, stable, and scalable hosting environment.
Why Use a Domain Name Instead of Public DNS/IP in Amazon EC2?
🔹 Easy Accessibility – A domain name is easier to remember compared to a numeric IP.
🔹 Stability – Public IPs assigned by AWS change when instances are stopped and restarted, while a domain remains static.
🔹 Professional Branding – Custom domains enhance credibility, making websites appear more legitimate.
🔹 SEO Benefits – Search engines rank websites with domain names better than those using IP addresses.
🔹 SSL Security & HTTPS – Domains allow secure HTTPS setup with SSL/TLS certificates.
Using a domain name in Amazon EC2 improves user experience and ensures a consistent endpoint for web applications.
Step-by-Step Guide to Using a Custom Domain Name in Amazon EC2
1. Register a Domain Name
A domain name can be purchased from a domain registrar such as GoDaddy, Namecheap. In this post, we will describe how you can use the domain name like https://lynxbee.com instead of Amazon public IPv4 address or public ipv4 DNS urls like ecx-x-x-x-0.us-east-2.compute.amazonaws.com …
1. Login to your AWS console.
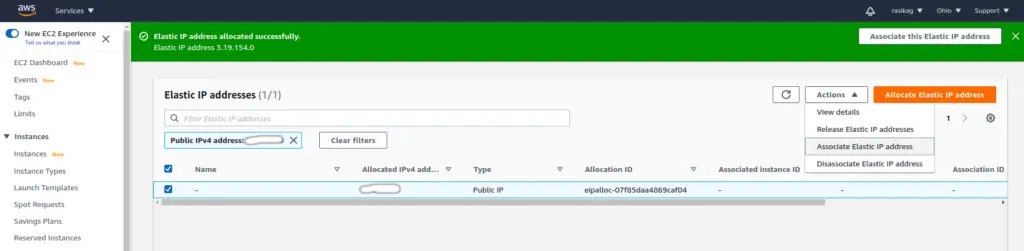
2. From dashboard, left sidebar , goto “Network & Security” and click on “Elastic IPs”
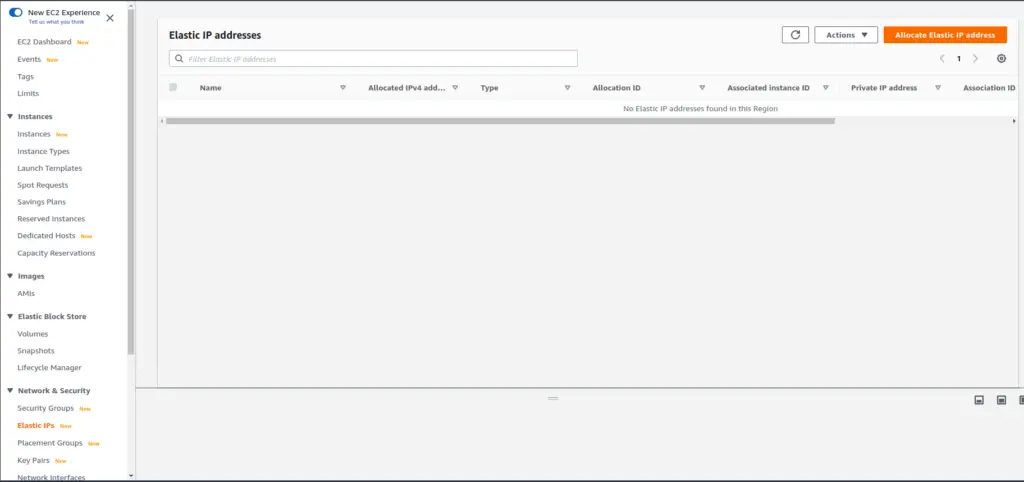
3. click on “Allocate Elastic IP address” and you will see the window as,
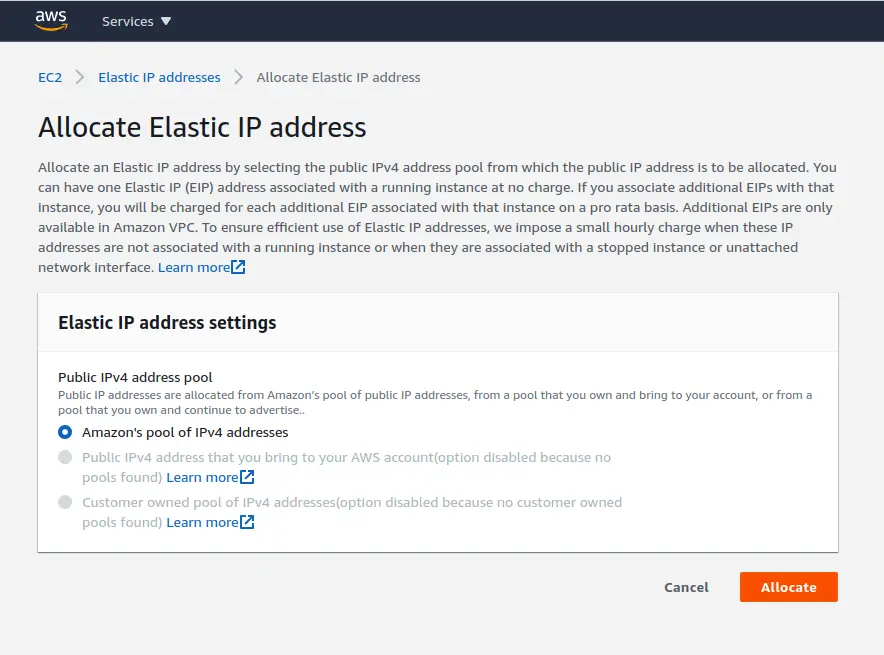
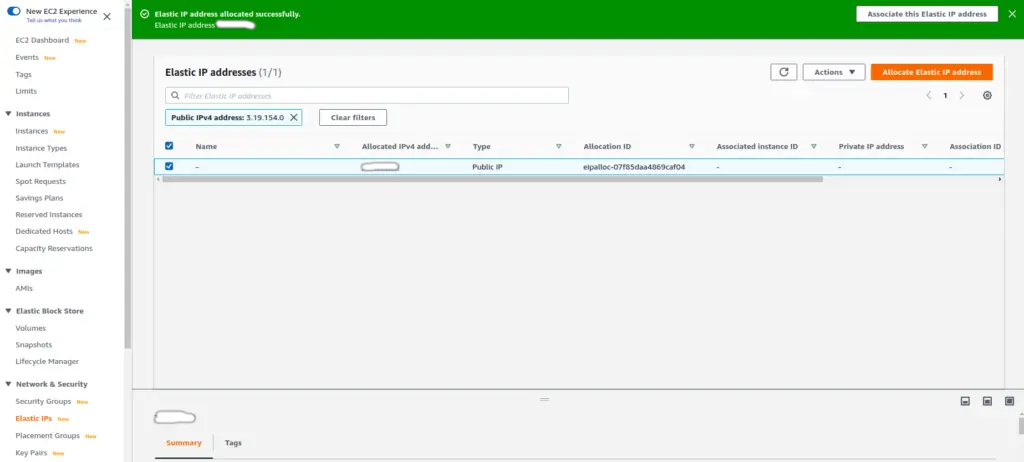
4. click on “Allocate”, once you click on Allocate,you will see dashboard as below, where you will see an IP address allocated.
5. Now, we need to associate this IP address to our EC2 Instance as, select this Elastic IP, and from top right drop down, click on “Associate Elastic IP address”
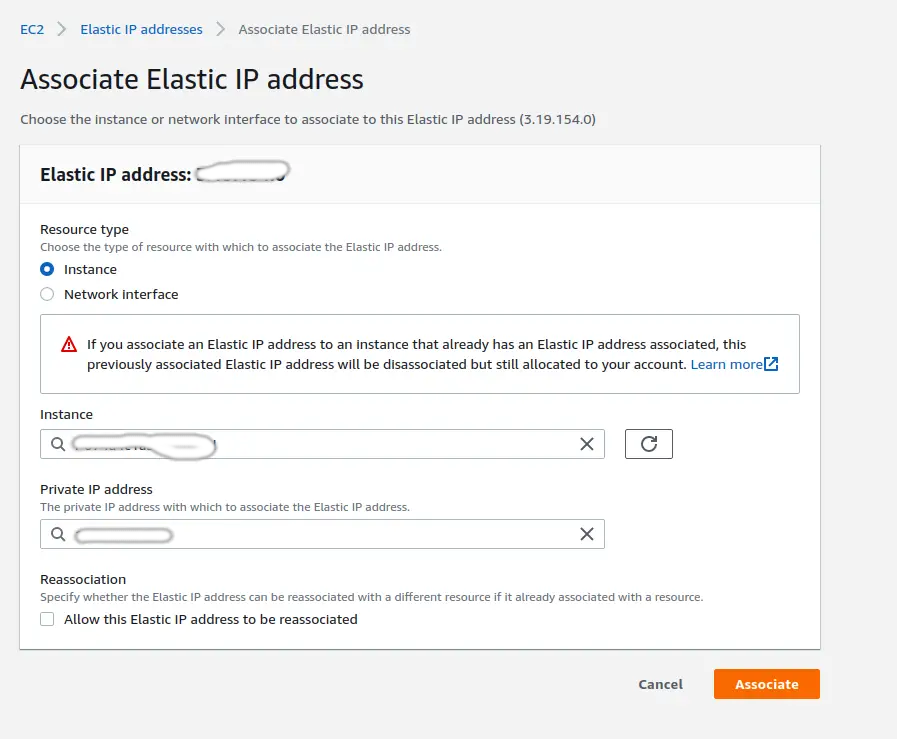
From the next window, in “instance” search for the instance IP where you want the domain to be assigned and respctive private IP address and then click on “Associate”
once you click on “Associate” on the next page you will see a message as below,
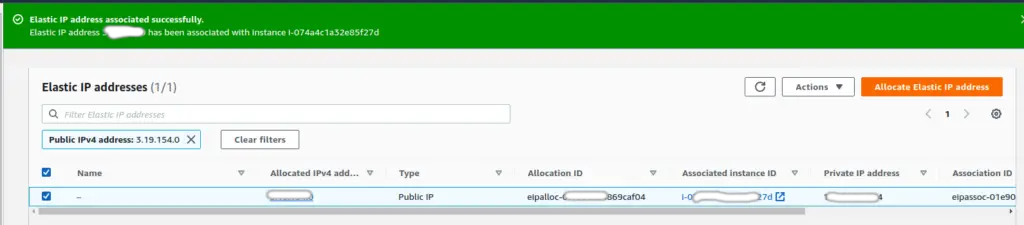
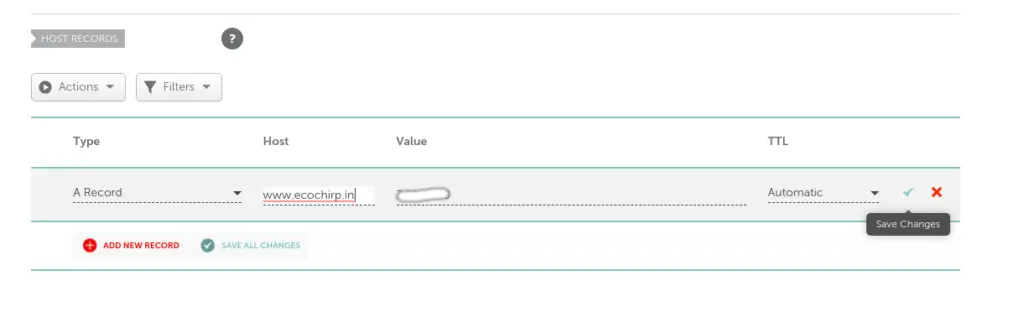
here, note the ip address from column “Allocated IPv4 address” which we need to add in domain settings.
Now, login to your domain registrar , and update the A record as below, ( here in first column select “A Record” , in second column enter the domain name which you want to associate with AWS instance, in third column, enter the Elastic IP as received in AWS settings)