Post Title: “Transform Your Searches: Change Chrome’s Default Engine”
How to Change the Default Search Engine in Chrome Browser?
The default search engine in Chrome browser dictates which platform processes your searches when you type in the address bar. While Google is the default for most users, Chrome allows you to customize this setting. Whether you prefer Bing, DuckDuckGo, or any other platform, switching is quick and easy.
This comprehensive guide walks you through the steps to change your default search engine, how it works, and troubleshooting common issues.
What is a Default Search Engine in Chrome?
The default search engine is the platform Chrome uses to perform searches. When you type a query directly into the address bar, also known as the Omnibox, Chrome redirects your request to this search engine.
Default options in Chrome include:
- Google: The most popular search engine.
- Bing: A robust alternative by Microsoft.
- DuckDuckGo: A privacy-focused option.
- Custom search engines.
How Does the Default Search Engine Work?
When you type into Chrome’s address bar:
- Chrome identifies your default search engine.
- It sends your query to that platform.
- The results are fetched and displayed on your screen.
Changing the default engine modifies where Chrome sends these requests, enabling you to personalize your browsing experience.
Steps to Change the Default Search Engine in Chrome
Changing the default search engine in Chrome is simple and requires no technical expertise. Follow these steps:
1. Open Chrome Settings
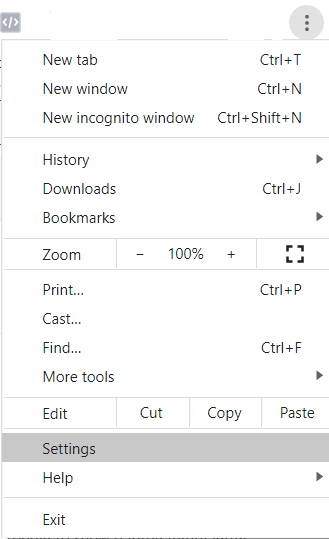
- Click the three-dot menu (⋮) in the top-right corner of the Chrome browser.
- Select Settings from the dropdown.

2. Navigate to Search Engine Options
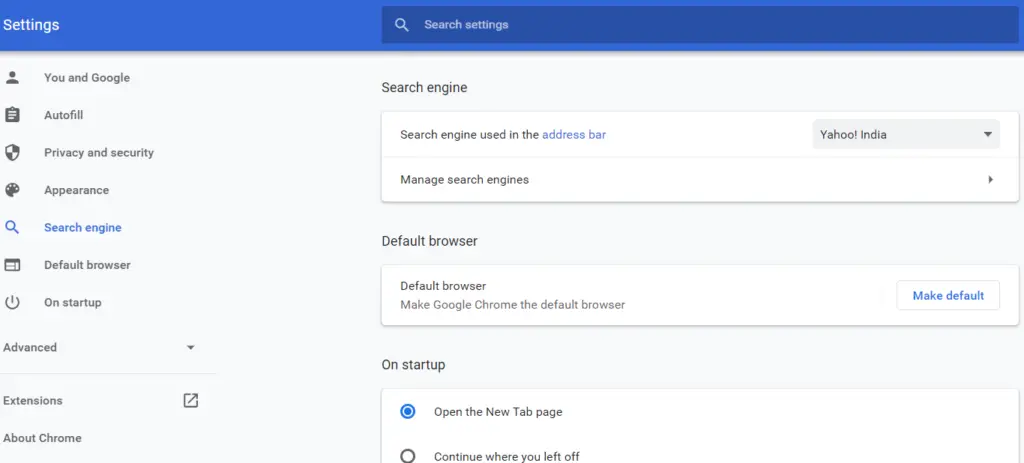
- In the Settings menu, find and click on Search engine on the left-hand panel.
- Alternatively, type
chrome://settings/searchin the address bar and hit Enter.

3. Choose a New Default Search Engine
- Under the Search engine used in the address bar section, click the dropdown menu.
- Select your preferred search engine from the list (e.g., Bing, Yahoo, DuckDuckGo).

4. Add a Custom Search Engine (Optional)
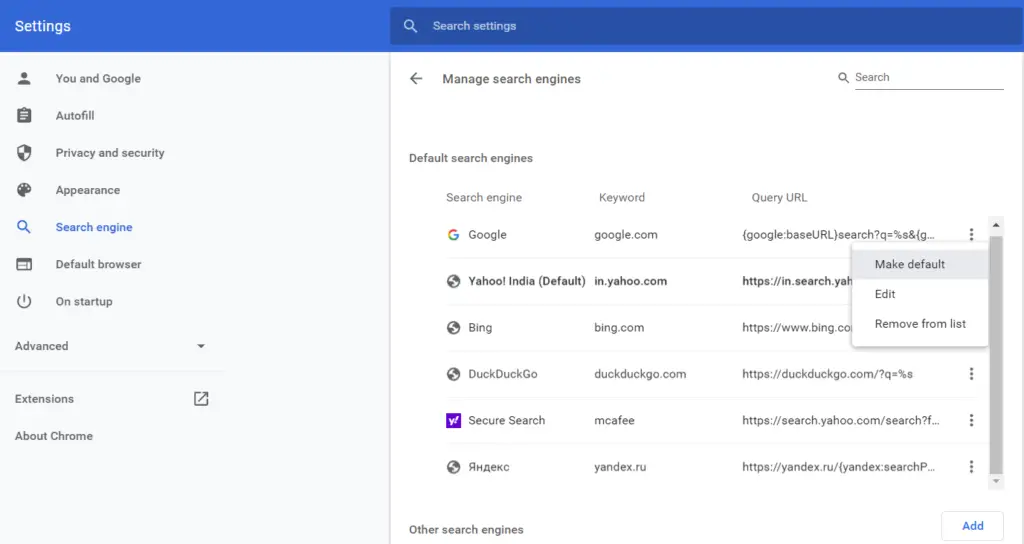
- Click Manage search engines and site search.
- Scroll to Other search engines and click Add.
- Enter the following details:
- Search engine name.
- Keyword for quick access.
- URL with %s in place of query.
- Name: DuckDuckGo
- Keyword: duck
- URL:
https://duckduckgo.com/?q=%s
5. Verify Your New Default Search Engine
- Go back to the Search engine used in the address bar dropdown.
- Ensure your chosen search engine is selected.
Probable Issues and Their Solutions
- Issue: Custom search engine not appearing in the dropdown.
- Solution: Double-check the URL format. It should include
%sfor the query placeholder.
- Solution: Double-check the URL format. It should include
- Issue: Search results still showing from the old search engine.
- Solution:
- Clear Chrome’s cache under Settings > Privacy and security > Clear browsing data.
- Restart Chrome.
- Solution:
- Issue: Default option reverts to the original engine.
- Solution: Ensure there’s no third-party extension or malware overriding the setting. Use chrome://settings/reset to reset browser settings if needed.
Why Change the Default Search Engine in Chrome?
- Privacy Concerns: DuckDuckGo offers enhanced privacy for users who wish to avoid tracking.
- Specialized Results: Bing or Yahoo may cater better to certain regions or user preferences.
- Customization: Make Chrome work the way you prefer.
Tips for Optimizing Chrome’s Search Features
- Shortcut Keywords: Use keywords like
gfor Google ordfor DuckDuckGo to switch engines on the fly. - Extensions: Try Chrome extensions to enhance search engine capabilities.
- Voice Search: Enable voice search in your chosen search engine for hands-free convenience.
